Yesterday,
the official made a few changes to how Cartel Packs work with the release of
the GEMINI pack. First: Grand Chance
Cubes/Bronze Items. In the past few months, folks have given their feedback
to the official and they preferred to receive Bronze items rather than Chance
Cubes, so the official re-introduced Bronze items back into the Cartel Pack.
The official introduced multiple Bronze items into the GEMINI Pack and has
reduced the drop rate of Grand Chance Cubes. Second: Pack Pricing Changes. Pre-KotFE Packs (2 pack items) - 300
Cartel Coins discounted to 250 Cartel Coins for launch.
KotFE
Launch Packs (1 pack item) - 200 Cartel Coins. GEMINI Pack (2 pack items) - 300
Cartel Coins discounted to 250 Cartel Coins for launch. All folks have
discussed the changes hotly, and I will list 3 main discussions in the
following parts.

#1“Given that nobody seems to have noticed (or
at least rode to BW's defense on their gleaming white chargers) that the packs
per crate count had risen, much less that the items per pack had also risen,
I'll have to agree that this might have been a good idea to have posted
yesterday.
I'm getting the
impression that this patch was finalized a lot later than usual, and some of
the post-finalization tasks were rushed and/or overlooked.”

#2 “The price increase is still not acceptable,
if the packs gave for example 6x more items (so 120 items instead of giving 20)
what they give now then you had a very good reason to increase the pack price.
Let me remind you all that the drop rates of the 5500 hypercrates since 4.0 are
very low on deco's and quite bad, the old hypercrates where also way to
expensive and terrible drop rates. It was better if you lowered the price to
2500 cartel coins, because that is more to true price, no scrap that better to
make it 1000 cc. Paying 40 bucks for getting random items is insane. And let me
remind you all, that people who bought the packs say we got less now then we
got before, so no Eric tell your bosses there to reduce the price 6x, because
this is legal money grabbing and it is absurd, you should feel ashamed about
it. People do not let yourself being foolish to participate with this, like I
said keep your 40 bucks, it is more worth around 10.”
#3 “I'm sorry but this explanation doesn't
improve my opinion on the packs.
* Bronze items are
already very common and cheap to buy with credits in the GTN soon after a pack
is released. Chance Cubes were worth 500,000 credits in the GTN while bronze
items quickly drop to a range of 5k to 20k. Swapping a 500k item for a 5k item
is not an improvement.
* The pack
contents needed improving to make them worth the previous cost. You improved
the contents. By also increasing the cost, you're right back to the same
problem. The contents are not worth the price.
* With the reduction
of rewards for Heroic quests, it will now be harder to obtain pack items on the
GTN. This also contributes to making the situation worse for players.”
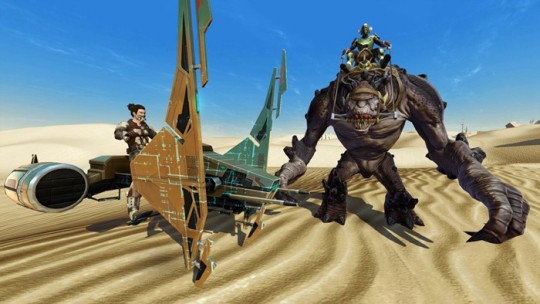
It
seems that new packs contain less and cost more, now folks are almost talking
about this and more detailed discussions are here. As a
result folks lose their interest and fewer folks buy credits from professional swtor gold sites to
insist on playing the game. Luckily, the chapter 16 will be coming in July, and
we hope the existing problems will be solved then, and more players will
re-play SWTOR. At that time, if you guys need swtor gold, you can choose us to buy cheap, safe
and fast swtor credits. Look forward to your coming!
2016年6月30日星期四
Monster Card Equip System in Tree of Savior
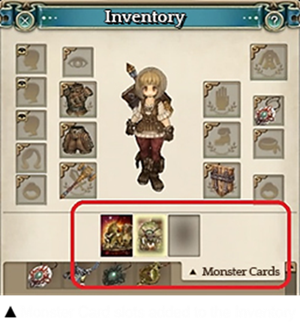
It is fairly simple to equip the cards in Tree of Savior, in the card slot you can either use the right click or drag and drop them. In order to increase its effect players can use different cards to receive different benefits or can use multiple copies of one card.
The feature is still being developed so be careful, what they show now may not look the same as the finished product. So what exactly is this monster card equip system you might ask. Well, they are equipable, just like your regular items, and they have their own unique bonuses! They will be hard to attain, so don’t think this will be some simple task. The developers plan on making the cards drop from Cubes which are acquired after defeating field boss monsters and bosses from instanced dungeons and missions. Your characters will get slots for the Monster Cards and you will get more slots as you get more ranks with your character. So if you’re, let’s say, a Rank 5 character, you will have 5 Monster Cards slots available to you in your inventory.
What are the boss cards for?
The sorcerer can summon monsters from the boss cards. Every wizard class is "strong". You attach the card to your grimore, and once you summon the boss, it can be used to attack (it attacks automatically and uses skills automatically, you can only control where it attacks, it attacks all enemies in the specified area). You can also ride your summoned boss around like a mount.
You can summon a familiar (that explodes for burst damage), a fire demon (that attacks for sustained damage), and a cat (that buffs you), along with the summoned boss.
What is the Monster Card Equip System?
We plan on making Monster Cards obtainable through the Cubes acquired after defeating field boss monsters and instanced dungeon/mission bosses.
Our goal is to create a function where these cards can be equipped by a character, just like equipment items. The Monster Cards will then have their own effects that are applied to the character when they equip the cards.
Equipping Monster Cards
New Monster Card slots will be added to the characters’ inventories. Each rank of your character will grant them one slot, so for instance, a Rank 5 character will have 5 Monster Card slots in their Inventory.
To equip a card from your inventory, you can either right-click it or drag and drop it on the card slot. You can equip different cards and receive their diverse types of benefits at once, or you can equip multiples of the same card and focus on a single effect that you want to multiply.
Can Monster Cards be Unequipped?
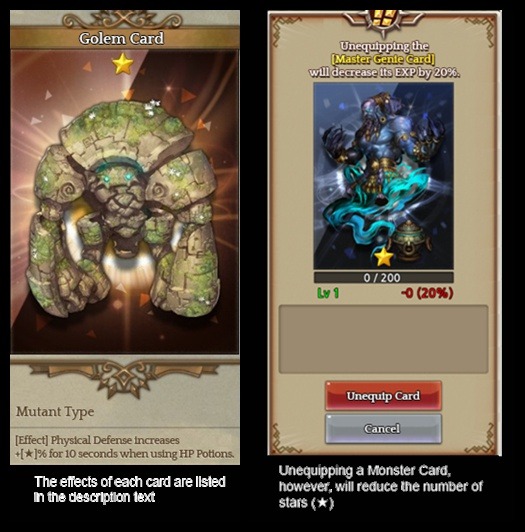
Monster Cards can be freely equipped and unequipped. Unequipping a Monster Card, however, will cause its EXP to decrease. See the images below.
Each rank of your character will grant them one slot, so for instance, a Rank 5 character will have 5 Monster Card slots in their Inventory. New Monster Card slots will be added to the characters' inventories.
You can equip different cards and receive their diverse types of benefits at once, or you can equip multiples of the same card and focus on a single effect that you want to multiply. To equip a card from your inventory in tree of savior, you can either right-click it or drag and drop it on the card slot.
After defeating field boss monsters and instanced dungeon/mission bosses Monster Cards will be obtained from Cubes acquired. These monster cards can be equipped by a character with this function, just like equipment items. When they equip the cards the Monster Cards will then have their own effects that are applied to the character.
All in all, sincerely hope the above information is helpful, if you have requirement, I recommend a reliable tree of savior silver seller site. Mmogah has safe and fast delivery tos silver and also has trustworthy and reliable tos power leveling service. Meanwhile they can supply customizing service and have tos items and you can buy tos items in the future when you need.
2016年6月28日星期二
Mmogah-A Professional and Reliable FFXIV Gil Seller
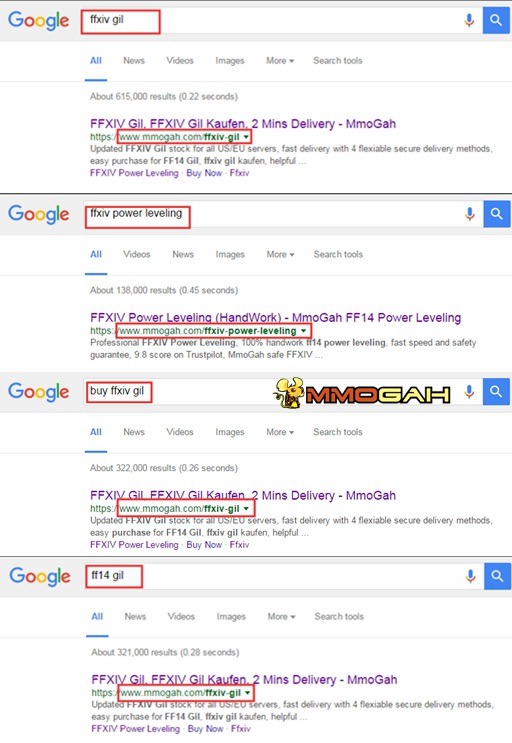
Searching “FFXIV GIL”, “FFXIV
POWER LEVELING” “BUY FFXIV GIL”, “FF14 GIL”…
via google, you will find “MmoGah.Com”
in the first place all the time. Don’t suspect your eyes, Mmogah ranks No.1
absolutely!
There is also our video shown in the first page of google-Where Is the Best Place to Buy FFXIV Gil Safely and Fast, which further instruct you how to choose a ffxiv gil seller. (It’s rare for video to reach such position)
Why Can Mmogah Own Such High Position in FF14 Gil Selling Industry?
1. FFXIV Gil Customers’ Support
Mmogah thanks all of our customers a lot, your support makes us on the top among ffxiv gil selling sites. “Trustpilot”, “Ownedcore” “Epicnpc” “Mmogah Reviews”… the four are our main review websites.
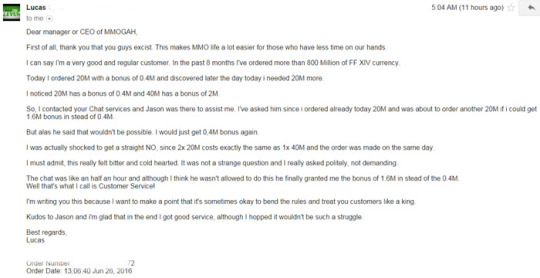
Of course, some warm-hearted customers write sweet words to us, we really appreciate them. Here is a recent customer letter, in which our customer places two 20M+0.4M orders and he should gain 0.8M bonus based on our rules, and then our loyal customer wants us to treat the two 20M+0.4M orders as a 40M+2M order, so we break the rules to satisfy our customer, because of “Customer First.”
2. Full FFXIV Gil in Stock, Five Servers in Promotion Each Day
We have full gil in stock, so we can totally guarantee that you will get your gil around 2 mins. In addition, The Cheapest FFXIV Gil Sales Promotion is updating at Mmogah, five servers each day, called “Everyday Discount”. Fast speed, cheap price makes so many folks like to buy gil from Mmogah.
3. Four Safe FFXIV Gil Delivery Methods
1). Face-to-Face In-Game: This is by far the safest method and we highly recommend it. Once logged in we whisper you in game, designate a place to meet or come to where you are, and make the trade. We ask you to give us an item while trading please, for appearances. This makes it so safe. In-game trades are unavoidable and this method is virtually impossible for SE to track. No customer of ours has ever had a single problem when this method is used while trading FFXIV Gil. This is also the fastest way to trade FFXIV Gil.
2). Through the Market Board: Note that with this method you will get 5% less due to MB taxes. If this is your preferred method, a representative will discuss the transaction to ensure everything goes off to your satisfaction.
3). We can deposit your FFXIV Gil to your FC chest.
4). Skip the Gil, Get the Item You Want: We buy items off the Market Board then trade the items instead of FFXIV Gil. This method is also very safe, but very slow and unpredictable with prices—it is easier to simply buy the Gil you need in most cases, but if you prefer this method please let us know.
4. Advanced Customer Service Reps System
We apply Common100.Com Online Service to contact with our customers, which is so fast that we can reply to you immediately. We know time is a very important thing for players, so we use the fast system to save a little time for our customers, they are all satisfied with it.
5. Simple and Easy Order Placed Process
There are just three steps in purchasing your gil, so easily! Even though the new customers, they can finish their orders smoothly based on the sweet instruction.
We never dare to say that our ffxiv gil service is the best, and need to gradually improve our service. We welcome you guys to provide us any suggestions, and we will immediately and carefully to adjust the impropriety. Look forward to your suggestions!
2016年6月27日星期一
The Analysis of Tree of Savior Silver Market
Recently, the gold market in tree of savior is not so active, and
most of the players and gold sellers want to know the reason. After analysis
and consulting from specialists, I think there are several reasons below:
The Analysis of Tree of Savior Silver Market
First Reason
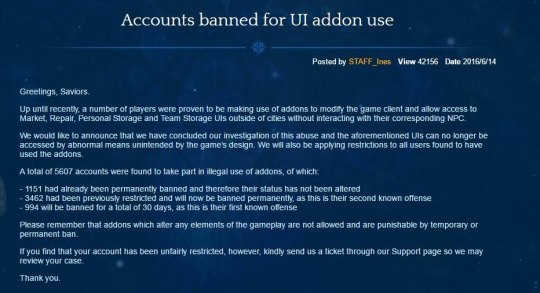
The following image is about accounts banned.
https://treeofsavior.com/news/?n=477
Some players who use UI addon and bot have been banned so it influences the orders
The following two images are the announcements regarding add-on.
https://treeofsavior.com/news/?n=502
https://treeofsavior.com/news/?n=503
The official website released two announcements about their policy on add-ons usages. We can see from this that the official website pays attention to this add-ons issue. So the two strict policies have influenced the tos gold orders.
Second Reason
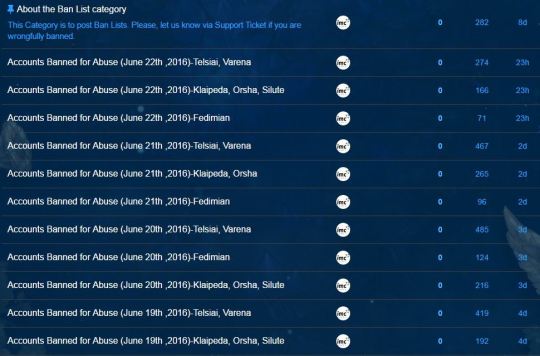
The following image is the ban list from official website.
https://forum.treeofsavior.com/c/news/banlist
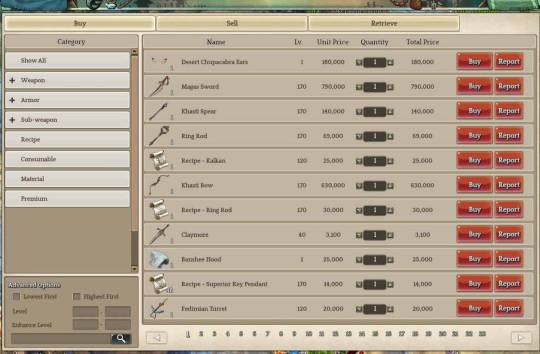
Recently players can use market report system in TOS, if certain player hangs many items which are traded much more than the real value and other players feel abnormal or weird when they see, they have right to report this immediately and freely, so most players dare not buy too much tos silver as they are afraid to be reported and got banned.
The following image is the report system.
Third Reason
As the players’ level becomes higher and higher, and more and more silvers they make can meet the requirement of themselves. On the other side, the transaction fee is too high relatively, so plenty of players choose to make barter method.
Fourth Reason
https://treeofsavior.com/news/?n=494
https://treeofsavior.com/news/?n=495
Recently Tree of Savior has just been reopened for new players probably some players want to wait and see.
The following is the Qs from one player and I want to share it with all the players.
Q: Can this game support direct dealing in items?
A: Yes. You need to bind after dealing and it can only be used by yourself, and also your Durability will reduce after dealing, and meanwhile it will influence your intensity in the future.
To sum up, I think the report system in TOS is the main reason of the depressed gold market, so choosing a reliable gold seller is the most important issue for all the players, and I would like to recommend a trustworthy gold seller website which is Mmogah, as they have 100% handwork tos gold and it is the safest gold seller relatively. We will find the safest delivery method and try our best to guarantee transaction security. If you have requirement, Mmogah has safe and fast delivery tos silver and also has reliable and trustworthy tos power leveling service. Meanwhile they can supply customizing service and have tos items and you can buy tos items when you need.
Hidden Quests in Tree of Savior
Recently
more and more players talk about hidden
quests in tree of savior, and most players want to know
more information about hidden quests in tos,
hereby I would like to share some experience when I playing in TOS, and also hope the information
below can help more players.
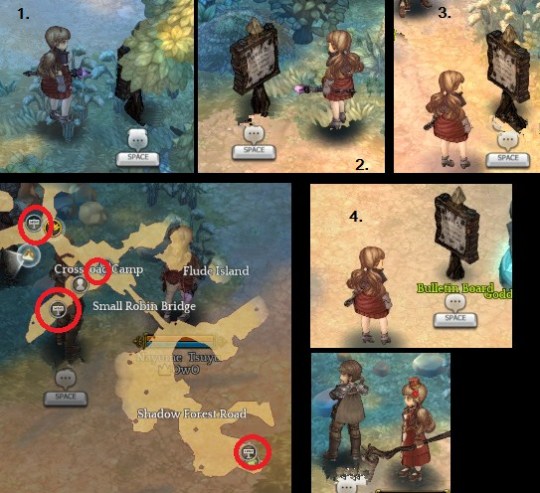
1. Military Support
Map: West Siauliai Woods
Quest: First talk to the guards in the woods, check the recruitment notice boards, and then talk to Knight Titas
Level Requirement: Can farm in Dvasia Peak (lvl 138)
Reward: Stamina+5 potion
How to unlock: Talk to 3 Soldier Recruitment Notice Boards then talk to Bulletin Board near goddess statue. Talk to Knight Titas later.
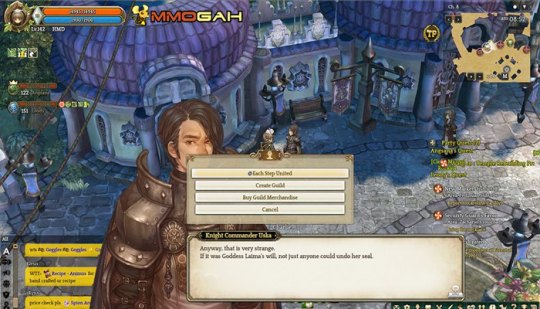
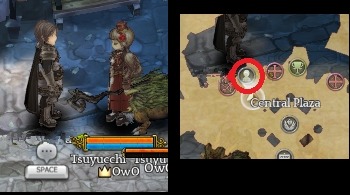
2. Each Step united
Map: Klaipedia
Quest: Kill 100 Monsters in Forest of Prayer
Reward: +100 Weight Potion
How to unlock: Talk to Knight Commander Uska
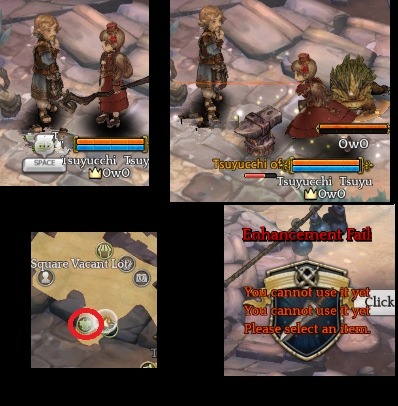
3. Failure and Success
Map: Ferdimian
Requirement: None, as long as you can walking to Ferdimian and have enough money to do.
Quest: Fail to enhance gear for about 13 times in front of the gear merchant NPC and then talk to him
Level Requirement: Can farm outside the town of Ferdimian (lvl 106)
Reward: SP+20 potion
How to unlock: Failed to upgrade weapon front of Equipment Merchant for 10 times. Talk to him. (Use low level white gear will help your save money.)
4. Each Step united
Map: Klaipedia
Quest: Talk to a knight NPC in the northwest of the town of Klaipedia
Level Requirement: Can farm in Forest of Prayer (lvl 148)
Reward: Weight+100 potion
5. Soldier Lindt’s Favor
Map: Overlong Bridge Valley
Requirement: Do all his quest first.
Reward: Stamina +5 potion
How to unlock: Talk to him after finish all his quest. Sit then talk to him.
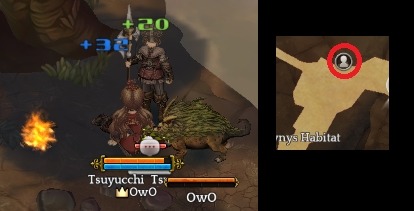
6. Owl Grave Test
Map: Owl Burial Ground
Quest: Talk to the NPC at Owl Burial Ground
Requirement: —
Rewards: SP +20 potion, Pink Hair Dye
How to unlock: Just find Romas NPC and talk to him.
7. Brother, and after
Map: Fedimian
Quest: Talk to Coben in Dedimian
Requirement: May need to complete The Wizard and Magician Tower first
Requirement: Completed all Coben chain quest. Might need to accept Gabija Main quest. Lv.107.
Reward: +100 Weight Potion
How to unlock: Talk to Coben, He’ll give you key to open some chest.
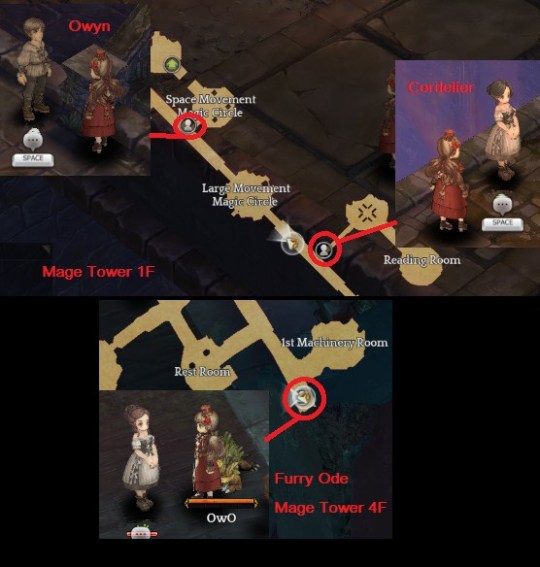
8. The Wizard and Magician Tower
Map: All maps
Quest: Talk to every Job master NPC and then come back talk to Thaumaturge job master. Look for some books in Mage Tower and read them.
Reward: Stamina +5 potion
9. Crafting and materials
Map: Mage Tower 4F
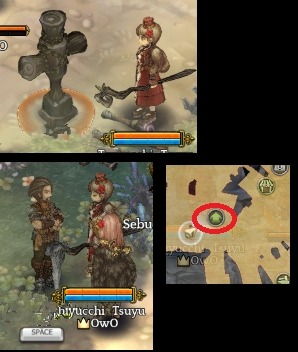
Requirement: May need to do all her quest first. (Her location will be different from pic below if done all her quest.)
Reward: STR+1 Potion
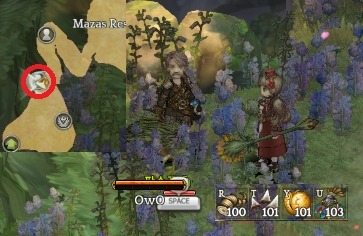
How to unlock: Have 300 Drake’s Horn in your inventory and talk to Furry Odd NPC
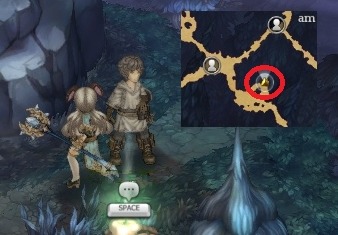
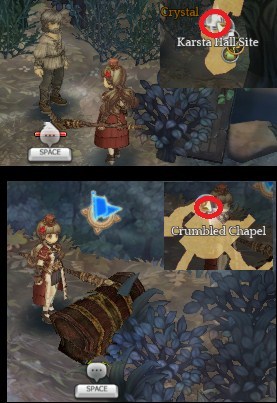
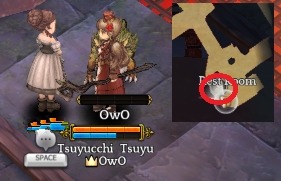
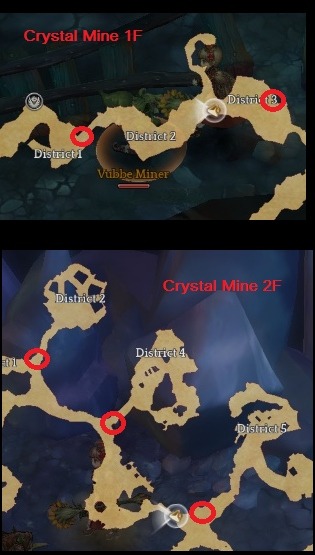
10. Open Sesame
Map: Crystal Mine Lot 2
Quest: A prelude will be automatically triggered in that area. Examine all Purification Machine in 1F and 2F and remember the 5 numbers you got. Go back to starting point, open chat window and enter the number to receive the quest
Requirement: Complete Crystal Mine Lot 1 quests
Reward: Dex+1 potion
Requirement: Completed all quest in Crystal Mine 1F, 2F, 3F
How to unlock: Talk to Purification Machine in 1F and 2F area. Remember numbers.
11. Repair the Practice Wooden Seal
Map: Map: Klaipedia (Highlander’s Master Training Hall)
Quest: Break the wooden practice dummy with one hit
Reward: Weight+100 potion
Requirement: None. Will work as long as you can kill those dummy.
How to unlock: Hit wooden dummy till it broken. Then talk to Highlander Master NPC after got Practice Wood Carving Scraps from broken dummy.
Go to 3F and walk in to boss room and go to the spot to enter Crystal Mine Lot2 – 1F
Walk to Reinforced Work Area and go up stair. Enter number in chat and accept quest.
12. Proving skills
Requirement: –
Map: Nefritas Cliff
Reward: SP +20 potion
How to unlock: Have Proof of Vubbe, Pantos Horn, Hogma Tusk and Merog Heart 100 each then Talk to guard Hames.
13. The Wizard and Magician Tower
Map: All, Mage Tower
Requirement: Might need to accept gabija main quest, might need to complete all side quest in Mage Tower first.
Reward: Stamina +5 potion
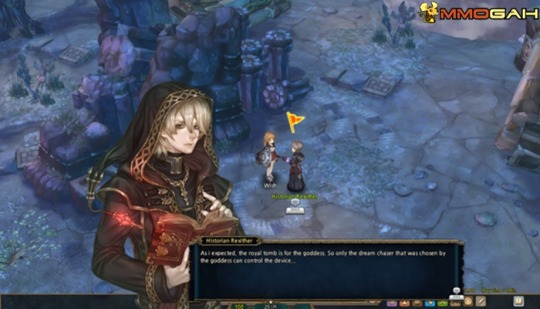
How to unlock: Talk to every Job master NPC. Here’s the list (Not need to be in order, May possible to accept quest at Thaumaturge Master NPC before talk to every master npc.)
Quest: After got quest go to Mage Tower.
14. The one who experienced death:
Map: Nefritas Cliff
Requirement:
Reward: +5 Stamina potion
How to unlock: Either die many time in tenet chapel (or die while fight chapparition boss) or Fight and kill chapparition boss once. Can’t confirm which trigger this quest. Then talk to Paladin master at Nefritas Cliff.
15. Can’t meet again: Credit to tvrozen who found the quest
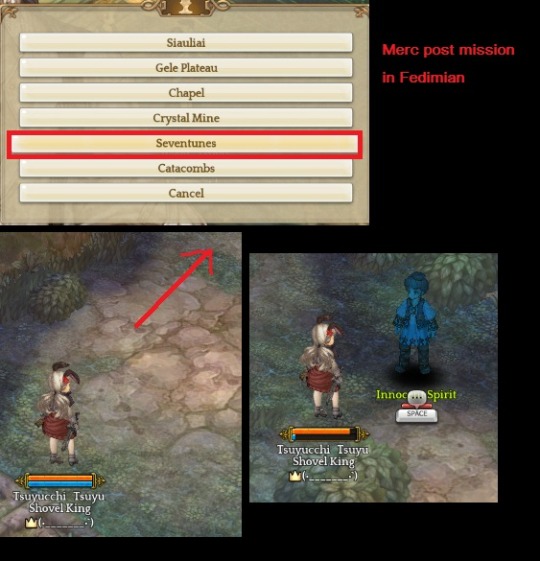
Map: Sevenhues (Seventunes) Merc mission in Fedimian
Requirement: Lv.100+, might need have and read torn diary Part 1,2,3,4 and talk to Lyliana in Klaipeda, Might need specific time to see NPC trigger (1.05 PM)
Reward: HP increase potion
How to unlock: Enter seven tunes mission by talking to Ramda NPC in Merc post in Fedimian. After kill first boss go to next room that have an order to kill monster. Then run pass trap to make next order completed, walk back to room before and go in the north room.
16. Suspicious favor of the messenger: Credit to Nishikawa, Ayalon, nizidr)
Map: Ramstis Ridge
Requirement:
Reward: Weight Potion
How to unlock: Check the 4 papers in map and note all numbers (Not sure if it need to trigger up his quest or not). Around 7:00 AM – 8:00 AM Errand Man NPC will appear at south east bridge island area. Type number ‘xxxx’ near him and try walk around him a bit to make quest trigger up.
Hopefully the above information can help you a lot, and if you don’t have much time or energy, you can seek help from a trustworthy TOS power leveling site, and also you can buy safe and reliable tos silver form this site.
2016年6月26日星期日
Crafting skills in the Elder Scrolls Online
No MMOs would be completely without some
Crafting. In Elder Scrolls Online,
the crafting system is very stream
lined, allowing every player to fling himself into and build themselves’ items.
ESO Crafting System offers adventurers choices and options of all description. Whether you want to be a master crafter or you just like to have some helpful buffs as you play, you’ll find exactly what fits your Personal style.
Although there is no restriction on how to distribute your points, to level every skill for every craft is close to 140 skill points, so practically you can only level up 1-2 crafts as these are the same skill points used to level your class, race, armor, weapon, and other skills for your character.
Evidently, each craft is different. Provisioners find recipes and ingredients all over Tamriel, and they can cook or create drinks if only they have a recipe and the corresponding ingredients. Enchanters and alchemists will need to try laboriously, discovering the traits of ingredients or the meanings of runestones.
Moreover, choosing skills wisely and not "gimping" your character is something to consider. The only way to level your crafting skill is via actually crafting items for that craft or deconstruct items made by that craft. Once the skill is a high enough level you will be capable of putting a skill point into it, allowing you to access new tiers of crafting.
ESO Crafting Guides
ALCHEMY
This skill line permits you to create potions.
BLACKSMITHING
You will be able to craft heavy armor and weapons with this skill.
CLOTHING
The opposite of Blacksmithing, Clothing lets you create light and medium armor.
ENCHANTING
This isn't a craft exactly, but more of an enhancement process.
PROVISIONING
This skill allows you to create meals that provide buffs to the player who eats them.
WOODWORKING
This skill doesn't produce armor, but allows you to make bows and shields out of various types of wood.
It’s the same situation in all of the above 6 skills, the higher you become the better materials you will be able to work with.
If you don't have enough time to level your character, you can buy ESO Gold (ESO Gold kaufen) to speed up your level. Just like other MMOs, ESO Gold can help players to play more smoothly. We can use ESO Gold to purchase not only gear and weapons, but also awesome items in game.
Of course, you can buy ESO Gold right here in Mmogah, since it’s a so reliable ESO Gold seller that more and more players chose to buy ESO Gold from. Whenever you need to buy ESO Gold, our Live Chat is 24/7 online.
2016年6月24日星期五
Guide of the First Raid in Warlords of Draenor – Highmaul
There are totally 3 raids in Warlords of Draenor, including
Highmaul, Blackrock Foundry and Hellfire Citadel. Highmaul is the first raid in Warlords of Draenor and I found that
our website had ever shared Blackrock Foundry Guide
and Hellfire Citadel Guide,
so in this article, I will share some tips for the Raid Highmaul, regardless of you are melee dps, tank, healer or
ranged dps. This guide is only for your reference.
Highmaul locates in northwestern Nagrand and you can head there from the closest fighting path Rilzit Mugshot. Before entering in the raid, repair your gear near the entrance with some wow gold. Bogruk, the repair vendor, is on the right outside of the raid. Just do it.
There are four difficulties in Highmaul Raid: LFR(25 players), Normal (10-30 players), Heroic (10-30 players), and Mythic(20 players). The average loot ilvl is between 645-685. Ilvl 640 for LFR, ilvl 655 for Normal, ilvl 670 for Heroic, and ilvl 685 for Mythic. At the same time, you have to collect some drop items from the bosses that are used for legendary questlines. According to I know, the ilvl is lower than Blackrock Foundry loot almost 10 ilvls.
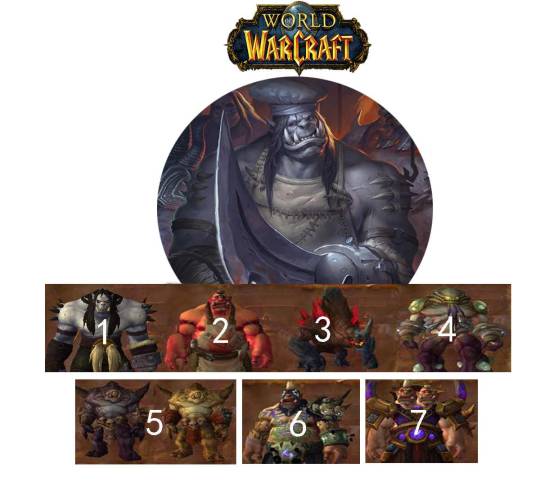
There are 7 bosses in Highmaul Raid: 4 main encounters and 3 optional encounters. Different tips for dps, tank, healing are listed below.
1. Kargath Bladefist (main encounter)
Melee dps: Make sure not to stand in Fire Pillars and don’t fall into the pits in order to avoid huge damage. Don’t stand in front of Kargath because this boss will pick a ranged target to rush towards. The boss like to throw targets, so if you are among the 5 closest players during Chain Hurl, don’t stand in front of mobs, bombs.
Ranged dps: Keep at least 7 yards apart from all players, so Blade Dance won’t hit multiple targets. Also don’t stand near the Fire Pillars. When the boss fixates on you with Berserker Eush, kite him as long as possible, if you’re unable to do this, run him through a File Pillar to break it.
Tank: Tank Swap: Impale (the attack)/Open Wounds (the debuff) @ 2 stacks. Or you can simply swap as Chain Hurl ramps up. As a tank, if you are not tanking the boss currently, then stand next to him during the cast to pull as many mobs as possible.
Healer: Make sure not to fall into the pits and don’t stand in Fire Pillars. Use external cooldowns on the tanks for Impale. On LFR difficulty, one healer will be sent to the stands at random to heal the DPS killing adds there. Healers should save raid cooldowns for when Iron Bomber are up and dying as well as heal the group sent up to the stands with them.
2. The Butcher (optional encounter)
Melee dps: the Butcher can use Gushing Wounds to debuff players that are closest to him, so as a melee dps, if you reach 4 stacks of Gushing Wounds, be sure to move from the closest group because when you reach 5, it means an instant death. Make sure not to join the ranged cluster as you will gain additional stacks when the boss does Bounding Cleave.
Ranged dps: Stand spread at least 8 yards from all other players unless you are assigned to be in a clump. When you are assigned to be part of a melee clump, then stay in melee range until getting 4 stacks of Gushing Wounds, after that, leave the clump and spread with the rest of ranged dps and only return to the melee only after your stacks drop.
Tanks: stand on top of each other to split the damage on the current target (Heavy Handed). You'll have to react to damage the entire fight, not just when you're tanking. Tank Swap @ 2-3 stacks of The Tenderizer.
Healer: Stay at ranged unless your group has assigned healers to stand with the melee piles.
Keep ground heals down on melee and focus heals on them for the split damage of Cleave. Use cooldowns during Bounding Cleave and sub 30% enrage.
3. Tectus (optional encounter)
Melee dps: Grasp the only time to kill or shatter any form of Tectus during Tectonic Upheaval and don’t stand between any form of Tectus and his Crystalline Barrage ability, also don’t stand in front of Night-Twisted Earthwarpers.
Ranged dps: stay far away from Tectus to avoid having Earthen Pillar in bad locations. Move away when the boss spawns Earthen Pillar. Save personal cooldowns when the boss reaches 100 energy and starts casting Tectonic Upheaval.
Tanks: Before the boss breaks apart: One tank will be on the boss, one tank will be responsible for picking up the orc adds and pulling them away from the boss. Distance will increase your chances of intercepting Gift of Earth. Also face the small add away from the raid.
Healer: Don't stand between any form of Tectus and his Crystalline Barrage ability. Don't stand in front of Night-Twisted Earthwarper. Use cooldowns during Tectonic Upheaval and move out of the rumbling earth before the eruption of Earthen Pillar.
4. Brackenspore (optional encounter)
Melee dps: don’t stand in front of the boss and don’t stand in the Creeping Moss that spreads through the room. Standing near full health Living Mushrooms to be healed is the best way. Use the Flamethrower to burn away Creeping Moss from around the boss.
Ranged dps: do not stand in front of the boss in order to avoid Necrotic Breath attack. Use personal defensive cooldowns at higher stacks of Infesting Spores. When taking too much damage, you can go nearby a fully-grown Living Mushroom to get healed.
Tanks: Face boss away from raid because of his frontal cone attack, Necrotic Breath, but position near a Rejuvenating Mushroom so that ranged and maybe melee can get the dps buff. Necrotic Breath: You cannot heal or be healed for the 5 second duration of the channel, so you must rely on shields, avoidance, and damage reduction cooldowns. Tank swap: 4 stacks of Rot.
Healer: Don't stand in the Creeping Moss. Don't stand in front of the boss. Heal up Living Mushroom and Rejuvenating Mushroom to full for raid wide buffs.
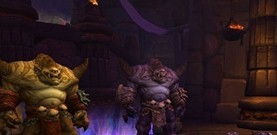
5. Twin Ogron (main encounter)
Melee dps: Twin Ogron is much more melee friendly so focus Pol if possible. Keep away from fire as possible and don’t stand between Pol and his Shield Charge target.
Ranged dps: watch out for Pol’s Shield Charge and stay away from its path, avoid the hit because you will get large damage. Stay away from Pulverize drops. Save your personal defensive cooldowns for Quake.
Tank: One tank on each boss for the entirety of the fight, close to each other as much as possible.
Move the boss out of the raid group so that no one but you is troubled by the damage. Environmental effects to avoid: fire on the ground.
Healer: Don't stand between Pol and his Shield Charge target. Be ready to heal on the move when Quake and Blaze happen and use cool downs for those. Stop casting during for Interrupting Shout so you don't get spell locked.
6. Ko’ragh(main encounter)
Melee dps: Kill Volatile Anomalies while the boss is Charging if possible. Expel Magic: Fire don’t stand near allies when the dubuff expires or is dispelled. Expel Magic: Arcane run away from the raid making sure to not run through other players. Expel Magic: Frost don’t stand near the frost orb.
Ranged dps: The main function of Spell casters in this fight is to break his Nullification Barrier. The longer the barrier stays up, the harder the boss will hit with his abilities. Move away from other players once the effects of Expel Magic: Fire are about to expire on you. Stay away from the Frost Orbs created by Expel Magic: Frost. Mechanics that can break snares are highly recommended.
Tank: Tank swap: Expel Magic: Arcane.
Tank with Expel Magic: Arcane needs to immediately run away from the raid because you're dropping little pools of magic that will explode in a few seconds and deal damage to anyone within 5 yards. Just keep moving around the outside of the room until the pools stop dropping.
Healer: Do not stand in Suppression Field. Players absorbing Caustic Energy will need lots of direct heals. Dispel Expel Magic: Fire if your raid is spread out enough, since it inflicts AoE damage upon removal/expiry. Otherwise, spread out to generally avoid its damage.
7. Imperator Mar’gok (main encounter)
Melee dps: kill Arcane Aberrations first and don’t run through the runes on the ground at range.
Ranged dps: If you're targeted by Arcane Wrath and it has 3 or more stacks, make sure to try to run away from everyone else so it can't jump. Also use a moderate-high damage reduction by the time it expires. Don't step on Destructive Resonance.
Tank: One tank with quick mobility should pull and handle all the Mark of Chaos debuffs. The other tank should handle the Arcane Aberration add. Tank swap: First swap
immediately after Mark of Chaos is cast, second swap when an Arcane Aberration spawns.
Healer: Pay attention to how you handle the Arcane Wrath debuff. Do not run through, or stand in or behind, the runes on the ground at range. Arcane Wrath inflicts heavy damage when it expires from a target. Heal them. Adds pulse with AoE damage while alive.
The above content is only for your reference. As a trustworthy wow power leveling website, Mmogah.com has an elite boosting team, can provide 100% handwork boosting and the most professional services. For any gaming needs, please contact our 24-hour online Live Chat at any time when you are free.
2016年6月23日星期四
Overwatch Golden Weapons as Rewards of New Competitive Mode
We
have introduced Overwatch's upcoming
Competitive Mode in last article: Overwatch Ranked
Play is coming. Now, fans can get their first look at
some rewards of competitive mode. There are plenty of cosmetics to be obtained
in Overwatch, but the really good stuffs are in the upcoming
competitive mode. Here mmogah as a
trustworthy overwatch boost site will
share some useful information with you.
The mode will offer several unique sprays, player icons and skins that will not be available in loot boxes. You can't purchase them with credits and have to earn them each season. When they climb to the highest rank, they'll be rewarded with a golden weapon! The top-tier rewards are golden weaponry, which will be given to the most proficient players.
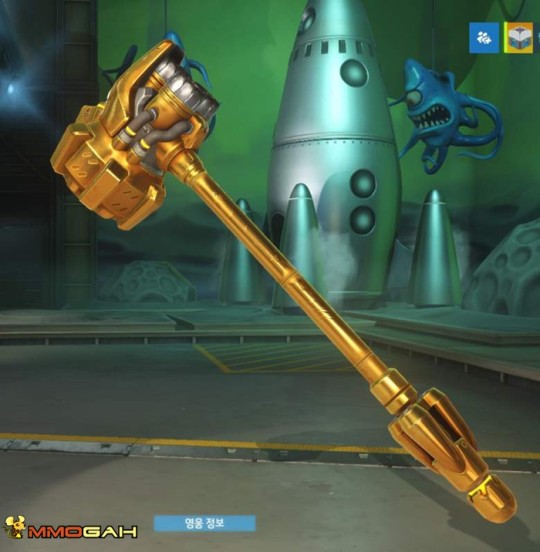
Early this week, Overwatch director Jeff Kaplan announced that Competitive Mode would have rich rewards - Golden Weapons, which are a new type of cosmetic, such as "golden Reinhardt Hammer" and other golden weapon skins. The highest-skilled characters will be able to unlock those stuffs faster than anybody else, and some cosmetic rewards only be gained by the highest-skilled players. If you earn some rewards, you can show off, and you are unique from other players. It's still unclear how to unlock these weapons, but we'll keep you updated on progress.
There are 21 heroes in Overwatch, each of them has standard version of golden weapon, such as Reaper's Shotguns, McCree's Peacekeeper, Tracer's Pistol, Reinhardt's Hammer, Symmetra's Photon Projector, Genji's Sword, Roadhog's Scrap Gun, Winston's Tesla Cannon, Mercy's Staff and so on. Although these weapons can't provide any gameplay benefit, the golden paint-skin really help them stand out.
Players will need to play 10 placement matches before receiving a rank, and ranks will be numbered from 1 to 100 ( Rank 1 is the lowest and Rank 100 is the highest). When you lose in this new system, your rating will be negatively affected, so winning and losing will cause a player's rank to go up and down.
So far, it hasn't been revealed exactly which rank do players can unlock some competitive rewards. Golden weapon skins for various characters have appeared in images online, but those aren't the only rewards players can expect.
There is a significant change in Assault maps of Competitive Mode. These maps are Hanamura, Volskaya Industries and Temple of Anubis, where you attack/defend two objectives. It will change the format in Assault maps, making those maps last longer. You will have more chances of back and forth between the teams.
Of course, the Ranked Play system is still a work in progress and subject to change. As for why it's not currently available for testing in North America, maybe the fact is that Overwatch is quickly becoming one of the most popular games in South Korea. Now the mode is for testing in South Korea, it means that this mode will arrive soon.
If you just starting to dive into the colorful and competitive world of Overwatch, you can read our overwatch guides and news to learn more skills. If you have no time or energy to speed up your level, you can buy 100% handwork and safe overwatch boosting service from a professional overwatch power leveling site.
Source: https://www.mmogah.com/news/news/tag/overwatch
For Media Contact:
Website: https://www.mmogah.com/
Skype: live:mmogah_1
TEL: 1- (512) 666-4240
Email: support@mmogah.com
Facebook: https://www.facebook.com/MmoGahGold
Youtube: https://www.youtube.com/user/MmogahGold
How to Place A FFXIV Gil or FFXIV Power Leveling Order at MmoGah.com
Have you placed a ffxiv gil or ffxiv power
leveling order at MmoGah
up to now? If you have placed one, you may know about our ffxiv gil or power
leveling selling service, but probably not all. If you have not placed one, you
may not know about us any. In order to make you better master the process of
buying ffxiv gil
or ffxiv
power leveling at Mmogah, here I will show how to
place an order at mmogah.com in detail.
When you are ready to buy ffxiv gil or ffxiv power leveling from Mmogah, you had better figure out the two “Q” first.
Q1. Do you have to register to buy at our site?
You don’t have to even though we recommend it. You can just directly place your order without signing up or logging in. Of course, there are more benefits if you are a member of mmogah, like faster checkout, lager discount.
Q2. How many ways to place order at our site?
Generally there are 5 ways to place your order: top navigation bar, left quick shop, left navigation bar, hot product list on homepage or bottom product list. Whenever you couldn’t find what you need, just consult our Sitemap.
If you have totally understand the two aspects on the top, then you can start buying your ff14 gil or ff14 power leveling based on the following steps.
Step 1: Place your order directly (then follow the step 2, step3…) or talk to our customer service reps to know more
Note: As the No.1 ffxiv gil seller in google, Mmogah has five servers in promotion each day, called “Everyday Discount”, in order to reward all our supporters. The servers on sale is really the cheapest and full in stock, so it is lucky for you to buy them.
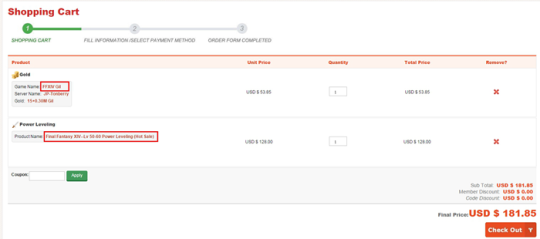
Step 2: Check out your Shopping Cart
You can add all the items for FFXIV at one time to the Shopping Cart, including Gil or Power Leveling, and check out them at the same time. That means, if you switch to another game, the shopping cart would be cleared!
If you choose quick shop, you can skip this step.
Note: There is a Coupon box, where you add your coupon code and then you will get discount. Where and how to gain a coupon code, you can find answer here.
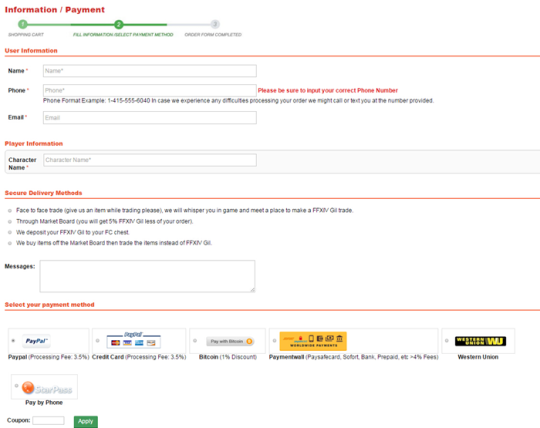
Step 3. Fill the information of your order
1) Fill the info of your Name, Phone and Email.
2) Fill the correct info of your Character Name.
3) Choose the delivery method that you prefer.
Face-to-Face In-Game
Through the Market Board
We can deposit your FFXIV Gil to your FC chest
Skip the Gil, Get the Item You Want
(Face-to-Face In-Game is by far the safest method and we highly recommend it. Once logged in we whisper you in game, designate a place to meet or come to where you are, and make the trade. We ask that you give us an item while trading please, for appearances. This is what makes it so safe. In-game trades are unavoidable and this method is virtually impossible for SE to track. No customer of ours has ever had a single problem when this method is used while trading FFXIV Gil. This is also the fastest way to trade FFXIV Gil.)
4) Leave your messages in the Message Box if you have some other requirements.
5) Select your payment method: you can choose any of the payment methods that we list.
6) Input your coupon if you have to get discount.
7) Place Order then redirect to Payment Page, do as it requires.
Then, your order has been placed now, we are able to deliver FFXIV Gil approximately 2 minutes after we confirm your payment in most cases.
Fantastic Sadhu in Tree of Savior
I’ve
always been interested in the Sadhu
class. I’ve been playing Sadhu recently in Tree of Savior, even though, the spirit, which gets
alienated from its body and can’t move far away from, it can move rather fast
within the possible radius. When it gets attacked from the monsters, the body
without the spirit becomes more vulnerable and receives greater damages. If you
explode the spirit yourself, then strong damages will be dealt on many
monsters.
Why choose Sadhu and how it works?
The Astral Projection skill is called Out-of-Body (OoB) and that is why you choose Sadhu. The spirit you project cannot be targeted or hit. In spirit form, the spirit’s normal attacks are based on magic attack power. As with typical magic attacks it cannot miss or crit. You have some skills that can only be cast in spirit form but you can still also cast your other skills. Interestingly your non-spirit spells will be cast by your body still. If you’re low on SP, you can cast OoB and then sit next to a bonfire, your body sitting down will accelerate your HP/SP regeneration and your spirit form can continue attacking things. You must take care that your body doesn’t get hit though, because when your body is hit, your OoB is interrupted and goes back into your body.
As you know in order to increase your astral body's range away from your real body OoB needs to be high. As sadhu you are in a sense and a high-range turret obliterating anything that comes within your range, that's why I think the more range you have, the more room for play you have.
Sadhu in tos gains insane attack speed and movement speed during his astral form. But since you are int based, if you just make auto attack and you deal high magic damage per second. You'll melt most enemies within seconds when you specialize in your auto attack damage. I would like to go for cleric 3 sadhu 3 maxing safety zone, divine might, astral body, Prakriti, astral explosion and possession. The evasion boost seems to already be noticeable even without DEX.
The only one problem you have is that you can draw enemy agro easily and just one hit is enough to cancel your astral form. That's why fade and safety zone are great for sadhu. While afaik your body in astral form also gains an evasion bonus in % but your armor drops. Since that's the case, I'm not sure if you couldn't also just build INT+DEX to increase your evasion instead of having to rely on Fade.
If you just want to use the astral body in order to use ranged spells from a safe distance lvl9 might be enough since you get additional range from your spells. But getting safety zone only to lvl5 is a great mistake imo (in my opinion). It's like Kyrie Eleyson from Ragnarok just that it has no drawbacks and it gains +2 extra hits, also it can take before it disappears for every level you invest into.
But lvl5 is better than nothing. I watched one sadhu leveling completely without safety zone. He kept getting interrupted and couldn't do much without playing extremely hectic. It was no big problem during boss fights but against a mob of enemies it was a pain to watch.
If you're going down the Krivis route then Zalciais might not be a bad choice for you but I don't think I have seen anyone using it. Later in the game Archers and Swordsman classes hit for like 2k damage and 10k when they crit (at least if they have a decent build). I think really you don't want the latter to happen.
Skills of Sadhu in tree of savior
Out of Body. This is your main skill, project your spirit which you control movement and attacks. Damage is determined by magic attack, it is multi hit (x3). Higher skill levels increase the range you can move away from your body. Pressing the skill after you already cast returns your spirit to your body.
Transmit Prana – A channeled buff which transfers 10 INT per level to someone else.
Astral Body Explosion – AoE Skill can be attributed to knockback (turn this off in PvM, will annoy party members). One of the few skills in game with % damage (250% Damage). High skill levels increase its base damage number.
Possession –Does a lot of damage and stuns. Fast multi-hitting channeled spell, interestingly it is not a spirit skill.
Pakriti –Use movement skill when your body gets threatened or better positioning is available. This skill moves your body to your spirit and ends OoB.
Vashita Siddhi – AoE Debuffs all enemy stats, however this is channelled and drains your SP over time so you will be inactive. You can trait this to confuse monsters to fight each other however (requires level 3) so this can be used for crowd control.
Important Notes – Sadhu OoB can be a little buggy resulting in a lot of rubber banding or things just not loading, when you find your character unusable try mashing OoB on and off or Pakriti to change position. I find doing that helps fix the problem most of the time.
For more news about Tree of Savior, welcome to visit Mmogah.com. If you don’t have enough time and energy to level your character, if you like you can try to choose our professional tos power leveling site for help and also you can buy safe and cheap tos gold for boosting your level.
2016年6月22日星期三
Overwatch Ranked Play Is Set to Be Released in Late June
"Earn some battlefield experience and get ready to set up your game. Prepare to prove yourself in Ranked Play"!
Overwatch Ranked Play (Competitive play mode) is set to be released in late June. Ranked Play is a new game mode in which you can compete and boost rank through a series of divisions and tiers in monthly seasons. This mode will bring a series of challenges to overwatch fans. Here mmogah as a reliable overwatch power leveling site details this new mode to you.
Competitive play mode has a ranking system that divides players into tiers based on their performance. You can improve your rank rewards in the form of spray, skins, and other cosmetics. Additionally, players are able to see their worldwide standing.
Overwatch Ranked Play System will be based on your skills, not your progression. The old system focuses on progression, if you reach a certain tier, you could never drop out of it, which is different from Ranked Play system. You can use your skill rating to determine your opponents in this new system, which is the real reason that fans are attracted to join the Ranked Play. At the beginning of each match, you'll be able to see every player's skill rating, so you'll know exactly who you're playing with and go up against.
Maybe you are thinking that it’s a simple formula: two teams of 6 players to control mobile payloads, capture points, and key strategic positions. Each of its four modes is easy to grasp, serving as the foundation for the various maps and the powerful heroes colliding within them, but actually it is not so simple. Overwatch is an amorphous organism that means different things are suitable for different players, depending on which hero you will choose, and what role you will personate in your team.
If you want to join Competitive Play, you can select “Competitive Play” from the main menu. You can queue up for solo or team. Most players always want to queue up for solo, but it is a team based game. The most popular competitive multiplayer shooter is Counter-Strike, who masters precision and pure strategy.
If you queue up for solo, the system will try its best to match your opponents; if you're playing with friends, the system will match your opponents who are similarly sized groups. Please note that you have to be at least level 25. This new mode can avoid low-skilled players to be matched up with high-skilled players, or it will cause balancing concern, especially when the Ranked Play mode gains ground on the leaderboard.
How Overwatch Competitive System Works?
- Players will start at Challenger 1 with 0 points.
- Players will earn 20 points for a victory.
- Players will lose 20 points for a defeat.
- Progressing from one division/rank to next requires 100 points.
- Progressing from one tier to the next requires 100 points while at that tier’s final division/rank.
- While in Challenger, Advanced, or Expert tiers, players will earn 40 points (instead of 20 points) for consecutive victories.
- While in Advanced or Expert tiers, players will lose 10 points (instead of 20 points) for a defeat if the match is lost during a tie-breaking round.
You will receive cosmetic rewards through playing the competitive mode. In addition to exclusive sprays and player icons, there is a customized golden gun system, which outfits your characters with gold-colored weapons.
All in all, the Ranked Play is coming in late June. Now it is a good time to start practicing with your favorite heroes and preparing for the battles.
Source: https://www.mmogah.com/news/news/tag/overwatch
For Media Contact:
Website: https://www.mmogah.com/
Skype: live:mmogah_1
TEL: 1- (512) 666-4240
Email: support@mmogah.com
Facebook: https://www.facebook.com/MmoGahGold
Youtube: https://www.youtube.com/user/MmogahGold
订阅:
博文 (Atom)